Integrating Firebase Cloud Messaging (FCM) with Expo enables React Native developers to implement cross-platform push notifications for iOS, Android, and web applications using a single JavaScript codebase. This integration combines Expo's streamlined development workflow with Google's messaging infrastructure, allowing you to send targeted notifications without managing complex native configurations or platform-specific code.
Building applications using React Native gives developers a lot of flexibility. Expo’s open-source platform is perfect for building cross-platform experiences, but you might need a little help getting users to interact with your app. That’s where push notifications come into play. Setting up an Android app and ensuring the app config is correctly managed for iOS projects are crucial steps in this process.
With Google's Firebase Cloud Messaging (FCM) and Expo, developers can seamlessly add push notification features into their apps and reach users wherever they are—iOS, Android, or the web. This guide walks you through why the Expo FCM integration is so helpful and how to set it up in your own app.
What Is the Expo Firebase Cloud Messaging Integration?

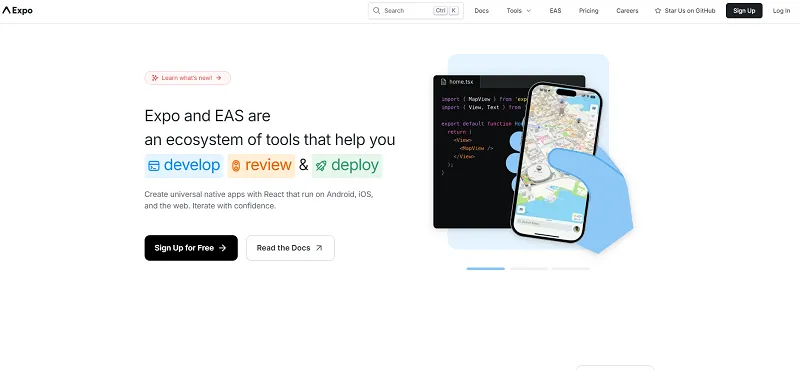
Screenshot from Expo.dev
Expo is a popular framework for mobile applications. Write your JavaScript code once and deploy it across multiple platforms without managing finicky native code integrations. This tool is incredibly valuable because it speeds up development time, allowing you to focus on building features instead of the complexities of native setups.
Expo simplifies many things, but integrating it with Firebase Cloud Messaging makes your job even easier. Firebase Cloud Messaging is a Google service that allows you to send push notifications and messages to Android, iOS, and web devices. It’s part of Google’s Firebase suite, which offers tools for app development, including analytics, hosting, and database management. Setting up the Apple Push Notifications service and managing credentials through your Apple Team is crucial for iOS push notifications.
The Expo and FCM integration enables developers to send push notifications on Expo applications using Firebase Cloud Messaging. This setup allows you to send push notifications to both iOS and Android devices from a single codebase. Plus, Expo provides helpful documentation for FCM integrations, making the process relatively straightforward. Remember to include the aps-environment entitlement in your iOS project to ensure proper functionality of notifications.
How To Integrate Firebase Cloud Messaging With Expo

Photo by Christina Morillo from Pexels
Integrating Firebase Cloud Messaging with Expo is a smart way for developers to streamline the development process while improving user experience—it’s a true win-win. Follow these steps to set up your Expo FCM integration properly. When handling messages, consider the background state for both Android and iOS, as Android uses Headless JS tasks and iOS triggers background handlers, which could complicate functionality by mounting the root component.
During the setup process, configuration files and notification channels are automatically created, such as the eas.json file, which is essential for effective application development.
Creating notification channels is crucial for effective notification management, especially when integrating with Firebase on mobile platforms like Android and iOS.
Development builds play a significant role in setting up push notifications, ensuring that properties like projectId are correctly attributed to the project for both iOS and Android apps.
Introduction to Firebase Cloud Messaging
Firebase Cloud Messaging (FCM) is a cross-platform messaging solution that allows you to send targeted and personalized messages to your users. As a key component of the Firebase platform, FCM provides a range of tools and services for building and managing mobile and web applications. With FCM, you can send push notifications, data-only messages, and other types of messages to your users, helping you to engage and retain them.
Using FCM with Expo enables you to integrate push notifications seamlessly into your React Native app. This integration allows you to send push notifications to both iOS and Android devices from a single codebase, streamlining your development process. Whether you want to send promotional messages, updates, or alerts, FCM provides the flexibility and reliability you need to keep your users informed and engaged.
1. Set Up Expo and FCM
Make sure you have an Expo project set up, a Firebase account, and the latest node.js installed. Use EAS CLI for managing project configurations and credentials for development builds.
Go to your Firebase Console to create a project. Go to Project Settings > Cloud Messaging. For Android, download your google-services.json file from Project Settings > General > Your Apps. For iOS, download the GoogleService-Info.plist file. Create an EAS project on the Expo Dashboard and link it to your local project to ensure proper association.
2. Add Expo to Your Project
You’ll use the expo-notifications module to handle push notifications. Run this command in Expo to install the library:
expo install expo-notifications
Additionally, you can integrate Firebase Push Notifications into your Expo app, even if you prefer not to use Expo Services for this feature. This involves configuring necessary files in the app.json.
From there, Expo will automatically link the module.
3. Configure Firebase
Return to FCM and update your app.json or app.config.js file to include your FCM sender ID. It should look like this:
"expo": {
    "android": {
      "googleServicesFile": "./google-services.json"
Make sure to log the FCM token for testing notification functionality.
If you’re sending notifications for iOS, be sure to handle permissions properly. You’ll need to add this script to app.json:
{
  "expo""ios""usesAppleSignIn"true"googleServicesFile""./GoogleService-Info.plist""bundleIdentifier""com.yourapp.bundle"
Additionally, integrate the plist file into the project setup for iOS under the expo.ios.googleServicesFile.
Next, add this code to your Firebase project to request and log push notification tokens:
 Notifications  'expo-notifications' Device  'expo-device'async  registerForPushNotificationsifDevice.isDevice) {
    status: existingStatus } = await Notifications.getPermissionsAsync();
    let finalStatus = existingStatus;
     (existingStatus !== 'granted') {
       { status } = await Notifications.requestPermissionsAsync();
      finalStatus = status;
    }
    if (finalStatus !== 'granted') {
      alert('Failed to get push token for push notification!');
       token = (await NotificationsgetExpoPushTokenAsync()).data;
    consolelog'Push Token:', token);
  } else('Must use a physical device for push notifications'registerForPushNotifications();
4. Requesting Notification Permissions
To send push notifications to your users, you need to request their permission first. On iOS devices, you need to request permission to display notifications, while on Android devices, you need to request permission to send notifications. The ``` expo-notifications library makes this process straightforward. Here is an example of how to request permission for notifications:
import * as Notifications from 'expo-notifications';

async function registerForPushNotificationsAsync() { const { status } = await Notifications.requestPermissionsAsync(); if (status !== 'granted') { console.log('No notification permissions'); return; } // Get the token const token = await Notifications.getExpoPushTokenAsync(); console.log(token); }
This code snippet requests notification permissions and logs the Expo push token if permissions are granted. Remember, you must use a physical device to test push notifications, as they do not work on iOS simulators or Android emulators.
5. Handling Incoming Messages
When a user receives a push notification, you can handle the incoming message using the ``` expo-notifications library. The ``` Notifications.addListener method allows you to listen for incoming notifications and handle them accordingly.
Here is an example of how to handle incoming notifications:
import * as Notifications from 'expo-notifications';

Notifications.addListener((notification) => {
  console.log(notification);
  // Handle the notification
});
This code snippet listens for incoming notifications and logs the notification details. You can customize the handling logic to suit your app’s needs, such as displaying an alert or updating the app’s state.
4. Test the Integration
Now that the hard part is done, it’s time to double-check your work. Run your app on a test device to see if notifications are running correctly. You can also try the Expo push notification tool to send a test notification with your push token. For more detailed instructions on managing message payloads and configurations, refer to the Firebase documentation.
However, testing on an actual device is always better because testing environments vary so much. If you’re testing web push notifications, webpushtest.com is a valuable (and free!) tool that provides a demo of standards-based web push notifications across all platforms, including iOS. Use the following command to install necessary dependencies and prepare your project for push notifications.
Additionally, use the following commands to execute setup processes in your project root directory, ensuring your app is properly configured for development builds.
Troubleshooting Common Issues
When implementing push notifications in your React Native app, you may encounter some common issues. Here are some troubleshooting tips to help you resolve these issues:
- Make sure you have the correct ``` google-services.json file and ``` GoogleService-Info.plist
file in your project.
- Ensure that you have enabled push notifications in your Firebase project settings.
- Check that you have the correct Expo push token and that it is being sent to the correct device.
- Verify that your device is registered for push notifications and that you have the correct permissions.
- Test your push notifications using the Firebase console or a third-party testing tool.
By following these tips, you can identify and resolve common issues, ensuring that your push notifications work reliably.
Security Considerations
When implementing push notifications in your React Native app, you should consider the security implications of sending and receiving sensitive data. Here are some security considerations to keep in mind:
- Use secure protocols such as HTTPS to send and receive data.
- Validate and sanitize any user-input data to prevent security vulnerabilities.
- Use secure storage mechanisms such as encrypted storage to store sensitive data.
- Implement authentication and authorization mechanisms to ensure that only authorized users can send and receive notifications.
- Use secure notification channels such as Apple Push Notification service (APNs) and Firebase Cloud Messaging (FCM) to send notifications.
By following these security considerations, you can help ensure that your push notification implementation is secure and reliable, protecting both your app and your users.
Your Users Are Waiting—Keep Them Notified
Expo is a helpful resource that seriously speeds up the development process. Instead of managing notifications manually, use the Expo and FCM integration to start sending messages in a matter of hours. The integration is cost-effective, user-friendly, and scalable, making it an excellent choice for apps of all sizes. If you're using Flutter instead of Expo, check out our Firebase Cloud Messaging Flutter integration guide. Additionally, when the app is in a quit state, specific background callback handlers need to be set up to ensure notifications are handled efficiently.
Still, this integration can’t handle everything. Take your app’s notification system to the next level with MagicBell. Our intuitive, developer-friendly platform helps you deliver seamless, in-app notifications that keep users engaged and informed—no heavy lifting required. Start your free MagicBell trial now to start sending notifications.
Frequently Asked Questions
Do I need a Firebase paid plan to use FCM with Expo?
No. Firebase Cloud Messaging is free to use and works well with Expo. You're allowed to send unlimited notifications to users without additional costs. However, you may want to upgrade to a paid FCM subscription if you need advanced features or send a lot of notifications.
What's the difference between Expo's push notification service and direct FCM integration?
Expo's push notification service simplifies sending notifications and the complexities of working directly with FCM and APNs (Apple Push Notification Service). However, direct integration with FCM (in a custom workflow) gives you more control over advanced messaging features, such as sending data-only messages or segment targeting.
Can I schedule notifications with Expo and FCM?
Absolutely! You can schedule notifications using FCM's backend tools or directly in Expo with the expo-notifications library. Firebase allows you to schedule notifications through the Firebase Console or programmatically via its SDK.
